Here it is. The guide you have all been waiting for. The Simple Gray T-Shirt ultimate guide to making your own baby food.
Before we get started with the How-To section, I want to tell you a quick story and the reason behind making all of my own baby food. (I'm much better in the kitchen than as a storyteller, so bear with me).
"This post may contain affiliate links, which means I receive a small commission, at no extra cost to you, if you make a purchase using this link."
I have always cooked.
In grad school, I lived with three other girls (luckily we all kept kosher) and we cooked a ton together. In fact, one of our roommates made us a house cookbook when we graduated so we could always have our favorite recipes in one place. The origins of the chocolate chip banana bread come from that cookbook. (thank you LG, now LS). We all loved being in the kitchen, and simple meals were the name of the game (you know we were busy studying, right).
When I moved to Chicago, I continued cooking most of my meals. Mostly because I love being in the kitchen, a fair bit because I'm cheap (or frugal, but cheap works for me), and a little because I hated going out when it was cold and dark (thank you Chicago winters for keeping me in the kitchen).
When the hubby moved in, he thought he won the jackpot.
I cooked...a lot.
Sure we went out on the weekend here or there for something special, but I liked cooking, he liked requesting recipes, we had the time, and it was fun. These meals were sometimes a bit more elaborate, but never hard for me.
The one tool I was always missing was a high speed blender and it was something I lamented often.
Finally, after years of talking about this blender (and destroying 2 or 3 cheap ones), we saved up enough credit card points and bought the best kitchen tool (along with my KitchenAid mix master which would join us later) I've ever had. The Vitamix 5200 blender. We must have lived off smoothies and soup for a month.
Then we had kids.
I still cooked every night. Meals got simple again, and when it was time to introduce my little ones to food (purees/finger foods/table foods, etc), I couldn't imagine not making it myself. I've always made the rest of our meals from scratch so it just made sense to me.
Please don't get me wrong. I believe that you should feed your children in whatever way works for you. What's important is that they are fed and healthy and happy. For me, I felt that I could easily take on making their food and I knew it was best for our family.
I want you to do what's best for your family.
This guide is meant to make it simple to make homemade food for your little one, not to guilt you for not. Make some, try one or two purees and buy the rest -- whatever is simple and makes you feel good. It's about making life simple.
With that said, I think you can do this! It's simple, and by purchasing just a few items, you can have food for a month made in an afternoon (or two depending on your freezer space).
Now, I do recommend having a high speed blender in order to make your own baby food.
You can probably use a regular blender, but may not get as fine a puree. They also sell all-in-one baby food makers.
I can't speak to how those work. I do know that I can make bigger quantities in a big blender, which tends to work better for prepping ahead and freezing. Either way, the techniques for prepping the produce and other food should work the same, regardless of how you are going to puree the final product.
Before I go any further, please know that I am not a doctor or a nutritionist.
Any advice in this post is from my experience. If you have questions about allergies, food sensitivities, etc, please speak with your pediatrician before trying any of the purees below.
Picking Produce
I buy produce one of two ways when I'm going to be using it for making baby food. Either fresh from the supermarket or my local produce store, or frozen (typically from Trader Joes). I don't use exclusively organic produce (it's not how we eat at home, so it's not how I fed my babies). If you want to use exclusively organic, go for it. If you don't, that's cool too!
Here is a list of the produce I suggest starting with for your adventures in making your own baby food and how I typically purchase it:
- Apples - fresh, any variety is good
- Avocados - fresh
- Bananas - fresh
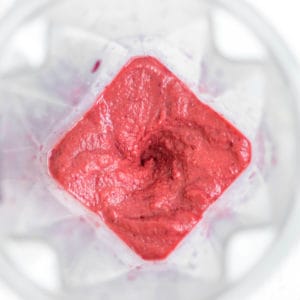
- Beets - whole, fresh
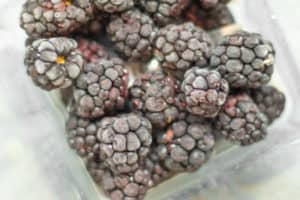
- Blueberries - fresh or frozen
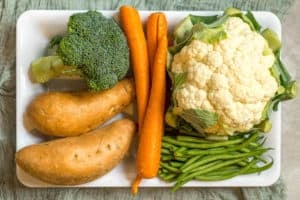
- Broccoli - frozen
- Carrots - fresh
- Cauliflower - fresh or frozen
- Cherries - frozen
- Green Beans - fresh
- Mango - frozen
- Pears - fresh
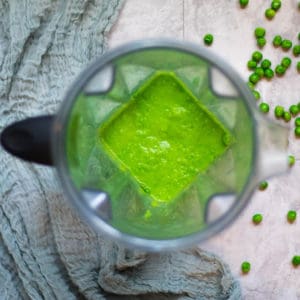
- Peas - frozen
- Peaches - fresh or frozen (depending on the season)
- Pumpkin - fresh or canned
- Strawberries - frozen
- Spinach - frozen
- Squash - fresh
- Zucchini - fresh
Legumes (or What's a Legume or a Pulse?)
Legumes are: any of a large family (Leguminosae synonym Fabaceae, the legume family) of dicotyledonous herbs, shrubs, and trees having fruits that are legumes (sense 3) or loments, bearing nodules on the roots that contain nitrogen-fixing bacteria, and including important food and forage plants (such as peas, beans, or clovers)
- Miriam Webster Dictionary
For our purposes, legumes (some are also known as pulses) are a great source of protein for your little one and make great flavorful purees. I buy my legumes one of two ways, either canned or frozen. When I used canned beans, I just make sure to thoroughly rinse them before using them for purees or in another recipe. I typically don't buy legumes dried because the process of soaking them is not quick and I like to keep things simple.
Here's the list of legumes I like for baby food and how I purchase them:
- Black Beans - canned
- Cannelini Beans - canned
- Chickpeas - canned
- Edamame - frozen
- Lentils - dried (they cook relatively quickly)
I'm getting to the "How-To" section, soon, I promise!
You now know which fruits, veggies and legumes I like to make into purees. But what do you mix them with?
In the beginning you'll want to introduce one puree at a time. Once you are sure your little one can tolerate the produce and has no sensitivities or allergies, you can start mixing in the following food groups to make more complete meals. I'll be writing a series of posts on good combinations for these items soon, but if you want to start playing, just mix and match flavors that you might like together.
Grains
Cooking your own grains for you little one is simple! These are probably things you already have in your pantry. The one thing to invest in here is the dry container for your high speed blender. This allows you to grind down whole grains into flour that cooks faster when preparing them for your littles. I use mine for grinding oats into oat flour often. You can also use the dry container for making nut flours (think almond, pistachio, etc).
Here are the grains I buy for making baby food:
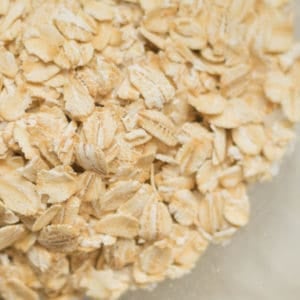
- Oats - old fashioned rolled oats
- Rice - white or brown rice
- Quinoa - any color you like
Dairy
While you aren't going to be giving your little one cow's milk for a while, you can start introducing other dairy into their diet. It's another great source of protein and fat (which is important for babies). I like to start with whole milk greek yogurt and cottage cheese and then get more interesting with flavors. My girls were eating parmesan, ricotta and goat cheese mixed with their veggies at an early age and loved it. This doesn't work for everyone, but I would recommend trying it.
Here's my list of dairy I suggest to start with:
- Whole milk greek yogurt - we use Fage Total
- Cottage cheese - 4% milkfat
- Shredded Parmesan
- Ricotta cheese
- Goat cheese
Other proteins (fish, chicken, beef)
I introduced fish to my kids early (I'm not including shellfish here because we don't eat it. Please check with your doctor for recommendations). They loved (and luckily still do) fish. It was easy to bake or steam it, and add it or serve it alongside a puree or two to make a complete meal.
I served them:
- Tilapia - pan fried or broiled
- Cod - baked or steamed
- Salmon - grilled, broiled, and in lox form (they LOVE lox)
- Whitefish - baked and smoked
- Tuna - from a can, we use chunk white (not more than once a week because of mercury concerns)
We don't eat a ton of meat or poultry in general (you probably won't find any meat dishes here), but I did try to include it with some purees. In fact, I always try to match the flavors that we ate for dinner. When we did eat chicken or beef, I would puree or shred some of the meat to go with their meals as well. I used an old fashioned grinder to make the meat the right consistency for them, and only made enough for one or two meals worth.
- Chicken - cooked in soup or crockpot so it was still juicy
- Beef - long slow cooked in crockpot or cooked in a sauce using ground hamburger
Whew, you made it this far! Good for you! I hope you are learning a lot.
Questions on any of this? Email me and we'll figure it out together. Want me to come teach you how to do this? Let's find a time for a 1:1 or create a class with friends!
📖 Recipe
the ultimate guide to make your own baby food
- Steaming
- Roasting
Ingredients
- 16 oz of the produce of your choice fresh or frozen
- or
- 15 oz can of the legume of your choice
Instructions
Produce
- Before you get started, wash and prepare your produce by cutting into equal size pieces. This helps everything cook evenly.
- Roasting (great for fruit and veggies):
- Wash and dry produce well
- Cut into 2-3 inch chunks and distribute evenly on a baking sheet (I cover mine with foil)
- For vegetables - drizzle olive oil (about 1 Tablespoon) and salt (to taste, about ½ teaspoon) over the produce along with any spices you might like to use
- For fruits - sprinkle with any spices you will be using and gently toss to coat
- Roast at 400 degrees for 15-45 minutes (time will depend on the type of produce you use)
- You want for fruits to get soft and vegetables to have a bit of char/color on them and get soft in the middle
- Remove from oven and let cool 10-15 minutes
- Place into a high speed blender and puree. You made need to add a bit of water to get things going, but only add about 1 Tablespoon at a time.
- Once pureed to your desired consistency, pour into silicone trays, cover with plastic wrap or wax paper and freeze until solid.
- Steaming (better for veggies then fruit):
- Cut produce into even sized chunks
- Put 1-2 inches of water at the bottom of a medium size pot and put a steamer basket in it
- Put the cut up vegetables into the steamer basket and cover with pot lid
- Turn burner onto medium heat, you want a low simmer here not a rapid boil
- Cook until fork tender about 15 minutes (try not to overcook, since you will start to loose some of the nutrients to the water)
- When done, let cool in pot for 10-15 minutes
- Place the veggies into a high speed blender and puree. You made need to add a bit of water to get things going, use the leftover water from steaming, adding about 1 Tablespoon at a time as needed.
- Once pureed to your desired consistency, pour into silicone trays, cover with plastic wrap or wax paper and freeze until solid.
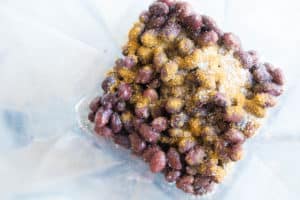
- From frozen (better for fruits and a few veggies)
- Let defrost about an hour on the counter
- Place into a high speed blender and puree. You made need to add a bit of water to get things going, but only add about 1 Tablespoon at a time. Fruit typically has a lot of water, so you
- Once pureed to your desired consistency, pour into silicone trays, cover with plastic wrap or wax paper and freeze until solid.
- No Cook (bananas, avocado, ripe stone fruit)
- Peel and cut into chunks.
- Place into a high speed blender and puree. You made need to add a bit of water to get things going, but only add about 1 Tablespoon at a time.
- Once pureed to your desired consistency, pour into silicone trays, cover with plastic wrap or wax paper and freeze until solid.
Legumes
- Open one can of beans of your choice
- Pour into colander.
- Rinse thoroughly
- Put rinsed legumes into blender and add ½ teaspoon of salt and any other spices you might like
- Puree. You made need to add a bit of water to get things going, but only add about 1 Tablespoon at a time.
- Once pureed to your desired consistency, pour into silicone trays, cover with plastic wrap or wax paper and freeze until solid.
Notes
- Want to roast a banana, go for it
- Want to steam cauliflower, have at it
- Rather leave out the salt, you can, but please add in another spice to widen babies palate
Nutrition
Want to start making your own baby food right now? Here are some items that will help get you going!
- Vitamix 5200: This is the workhorse machine I use everyday. You can get it here.
- Freezer Trays: I like these and these, but use any tray that works for you and is easy to clean.
- Sheet Pans: I use these for everything in the kitchen. You can cover with foil for easy clean up.
- Steamer Basket: Use any steamer insert you have, but I like this one because of the handle and its dishwasher safe!
- Groceries: Amazon Prime Now can get them to you in a few hours, Instacart can get them to you today. Or add them to your Peapod grocery list and don't be stuck with out them again!


Leave a Reply